When we first moved into our unit in Balwyn, I spoke with my father-in-law about whether we should install underfloor insulation. His response: “put some slippers on.”
I guess he hails from the era of “if you’re cold, put another jumper on.” Well I’m a little tired of wearing four layers in my house during the depths of winter, and it’s too expensive to run the heater all day. I’ve also worn out two pairs of slippers!
It’s estimated that 10-20% of heating is lost through the floor. While ceiling insulation is undoubtedly more effective and should be prioritised, 10-20% is not to be ignored. When we calculated the cost of running our heater over the past 12 months, we realised we are losing around $100 per year through the floor.
The other key reason for considering underfloor insulation is comfort. Yes, the dollar savings add up and make the investment case, but I was particularly keen to see if the insulation would increase our comfort levels so I could turn the heater down a little and kick off the slippers.
So, time to install some underfloor insulation and use our house as a test case for the benefit of Powrhouse customers.
The Quick Take:
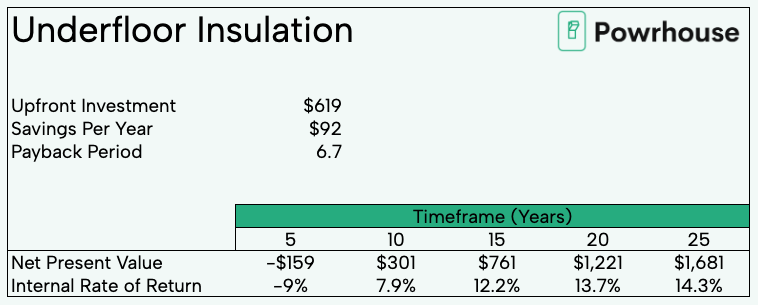
- Estimated savings of $92 per year for our house
- Financials depends on whether you install DIY or pay a professional
- Reasonable improvements to comfort
- Does not need replacing and will keep saving for a long time
- Only worth it for floorboards, probably not worth it for carpeted floors
Types of Insulation
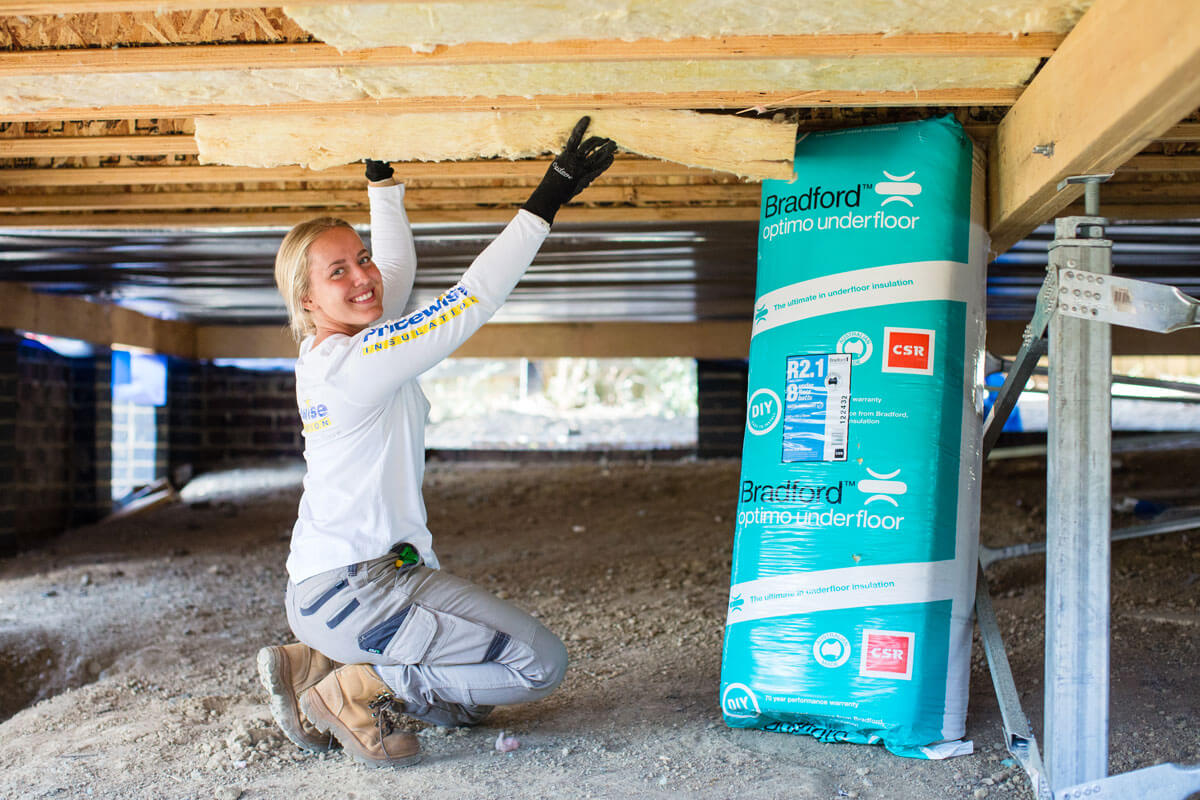
There are two main types of underfloor insulation: foil insulation and polyester insulation. Either system is designed to insulate floorboards from direct contact with the cold outside air. The polyester products insulate the floorboards, wrapping underneath them like a warm blanket. The foil insulation creates a gap between the floorboards and outside air (hence the term “air-gapped”). We spoke to a number of providers and received a number of different opinions, so unfortunately it wasn’t clear which way to go.

We were leaning towards the foil insulation. But, when we looked under the house, it was clear installation would be messy. There are pipes and wires and other obstacles that will require cutting the foil into different shapes and sizes to mount to the underside of the joists. Installation would not only be messy but likely less effective. We also saw a video which suggested people need to consider the ends of the floorboards, where the floorboards meet the walls, making sure there are no gaps. We could see this being an issue so we decided on polyester insulation which is easier to install. There are a number of how-to videos on YouTube, with the most important issue being not to staple the insulation to live electrical wires!
The Process
With the help of my father-in-law, we set about installing the insulation.
It was hard work! Our installation was very difficult as we have a slight slope to the block of land, so in some places we had plenty of room, but in others we probably only had 300-400mm to crawl around and installation was done lying on our backs. We installed the insulation over two days (I’d say 3 hours or so each day), so it could have been done in one day if we were keen. For Powrhouse customers, we suggest one full day would be ample time for a typical house with plenty of clearance. The Youtube videos recommended, and we agree, it’s much easier having a second person to help.
The Results
Installing underfloor insulation made a reasonable difference. After the first day, when we covered half the kitchen/living room, immediately my wife and I noticed two things:
- We turned the heating down – we normally have our split system set to 21 or 22 degrees in winter. We immediately turned it down to 18 to 19 degrees.
- Comfort – as half the living space was insulated and half was not, we could immediately feel the difference on our feet. The insulated space lost that bitter coldness which had us reaching for our slippers.
The Insulation cost $619 delivered. We estimate it will save $92 dollars per year in gas savings, which is a payback period of 6.7 years. The payback period would be longer if we paid for the installation with an additional cost of labour. The dollar savings per year would also be less with electric heating, which is more efficient and cheaper than gas heating. On the plus side, we haven’t factored in any savings from cheaper cooling in summer months (we don’t use the air conditioner much), but that would definitely increase the economic case for underfloor insulation.

Bigger houses will have larger upfront investment as they will require more insulation, but they will have greater yearly savings.
The ‘No’ Case
Professional insulation costs for our house would have been closer to $2,000 for supply and installation (compared to $619 that we paid just for materials). Even though the footprint of our house is relatively small, some insulation companies have a 100 m/2 minimum. At a cost of $2,000, the payback period would be closer to 20 years.
Some houses which have a strong thermal envelope may not benefit from underfloor insulation. If your ceiling and wall insulation are good, and your windows are reasonable, the incremental gains from underfloor insulation may be minimal. In these cases, the savings from underfloor insulation would be low (as energy costs are already low) and the primary driver might be comfort.
Equipment Hire
Installing underfloor insulation requires a staple gun. We have a Makita cordless staple gun which is a terrific tool. We are happy to lend out the staple gun to Powrhouse customers for free (a deposit is required).
Conclusion
We think installing underfloor insulation will depend on each household. The ‘yes’ case is strong where you can install the insulation DIY, where you are looking to improve the comfort of the home and where wall insulation is weak. Underfloor insulation is harder to justify where it will need to be installed professionally at a greater cost, where you don’t plan on living in the house for a long time and where the house has a strong thermal envelope with minimal energy costs.


 Subscribe to Our